Content editor
User guide
1. Take a look
1.1. User interface
The editor offers all the functions necessary for structured writing: it allows you to manipulate information and not formatting or layout:
As a writer, you associate semantics to groups of words.
Therefore, you don’t work on a document as it’ll be published.
The stylesheet of each publication takes advantage of the semantics to apply the expected formatting.
![[Tip]](cco-tip.svg) | Data processing |
|---|---|
Structuring content also allows treating information for other goals than formatting, like compiling names of products mentioned in a document. |
Calenco editor has several areas:
We believe that you don't have to know the code in detail to produce your documentation. Nevertheless, documents delivered with Calenco are conform to the DocBook XML standard.
The editor guides you at each step ensuring this conformity.
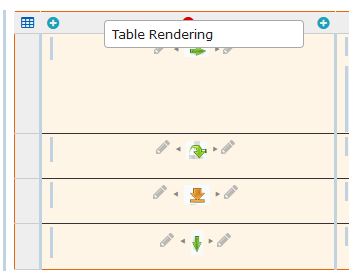
When inserting elements, the editor proposes you options with the following icons. Click on the icon corresponding to your need:
Table 1. Insert options
|
|
The element is inserted at this place.
| |||
|
|
The inserted element encompasses the current element. | |||
|
|
The inserted element overwrites the current element. | |||
|
|
The element is inserted at this position in the text. |


1.2. To manipulate elements
Structured documents are made of elements nested in one another. Those elements are represented under different aspects:
- the element in the Context,
- vertical bar, on the left of the element in the area for editing,
- a tree item in the navigation tab on the left.
You can select these elements by clicking on their representation to perform the desired actions.
2. To structure
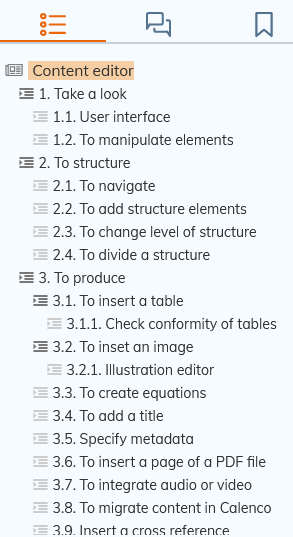
The structure of the document is represented as a table of content in the area on the left. This view allows navigating through the document and modifying it.
This area can be hidden using  located at the top left of the Calenco logo, to enlarge the editing area.
2.1. To navigate
In the table of content, click on a title to quickly access the corresponding content.
| |
Use the keyboard shortcut Alt+ to fold or unfold the structure. |
2.2. To add structure elements
You can insert content-structuring elements in two ways:
- From the icon bar ;
Form the contextual menu of the table of content.
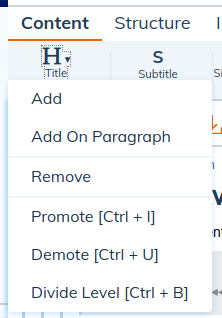
2.3. To change level of structure
To reorganize the structure of the document sometimes implies to change the type of element.
The following features allow to turn elements (part, chapter, section) into other elements depending on the need, promoting or demoting the element in the structure.
You just need to select the involved title and launch the command:
![[Important]](cco-important.svg) | Create a new title |
|---|---|
a paragraph consists in turning it into a section. |
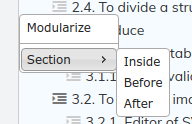
2.4. To divide a structure
To divide a structure allows to create two structures of the same kind as the current structure: the content is divided in 2 structures from the cursor.
See the demonstration of the interface and the basic features of the editor:
2.5. Transform a structure
It is possible to transform an entire file using a transformation style sheet.
In the menu → , choose the style sheet corresponding to the need:
The editor closes the file and reopens it with the transformations. The version history is updated.
| |
The transformations are completely personalized and are the result of development. Please contact your usual NeoDoc contact ( |
3. To produce
Inline elements are accessible in the menu .
3.1. To insert a table
Use the icon bar to insert a table.
Use the icons  and
and  to add or delete lines or columns.
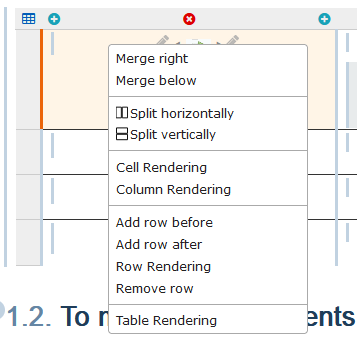
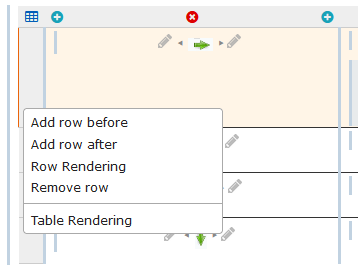
Use the menu or the contextual menu (right click on the upper gray bar, in a cell or on the gray bar to the left of a row) to modify the structure of a table or the configuration of its elements:
The icon on top left ![]() displays identifiers of lines and columns: it’s especially useful to set up calculations (Variables and functions in a table).
displays identifiers of lines and columns: it’s especially useful to set up calculations (Variables and functions in a table).
3.1.1. Check conformity of tables
This feature checks the conformity of tables. This feature is especially useful when importing files with merged cells in tables.
Click on → .
If there is at least an error in a table, a message describing the error found is displayed on the screen:
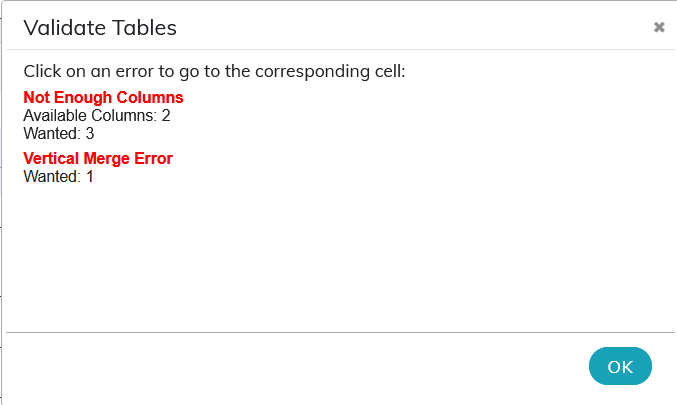
By clicking on the error, the corresponding table is displayed on the screen.
| |
Validity of tables is automatically checked when saving. Those errors are not blocking for editing but they might be blocking for publishing: we strongly advice to correct them when encountered. |
3.2. To insert an image
It is possible to insert images in contents. Different formats are supported:
JPG - compressed format, suitable for photos.
PNG or GIF - raster image, suitable for screenshots and graphics.
SVG - vector format, suitable for illustrations.
SVG and translations Translation tools support this format: it allows to share a unique picture through different languages.
![[Note]](cco-note.svg) | Other formats |
|---|---|
Other formats such as PDF or TIFF can be used as images but are not recommended because not necessarily compatible with all your publication formats. |
Click on menu , then choose or depending on the case:
- To insert a simple image;
- To insert an image with title ;
- To insert an image containing hotspots;
- To insert an image editable with the editor of images integrated to Calenco (SVG format);
- To insert an inline media or an image in the text.
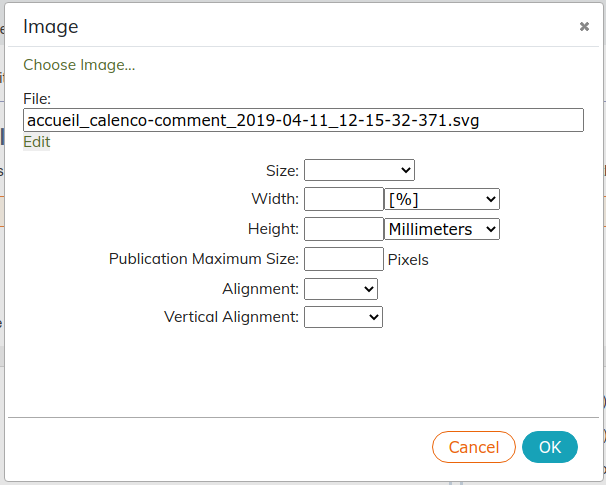
Set the cursor where to insert and click on icon
 to choose the image to integrate and set up its publication:
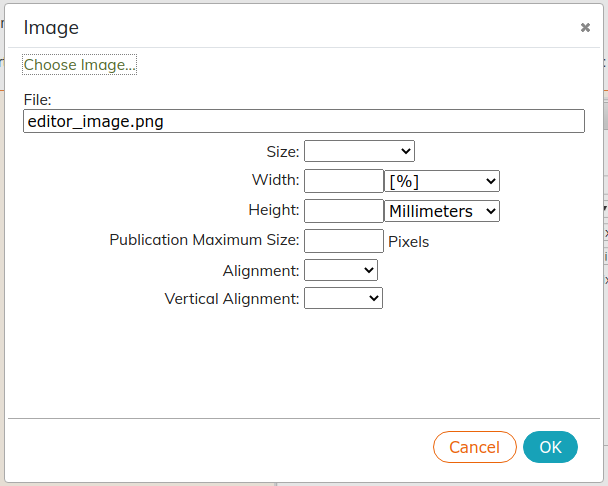
Preferably specify a relative size (as a percentage of the available space). In general, adjusting the width is enough, as height is adjusted proportionally.
By selecting the empty option
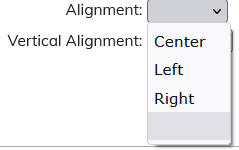 in the or menu, the image will be aligned with one of the three options set by default in the style sheet.
Click on .
Selecting the import language Don’t forget that images like contents:
- are broken down by language,
- you can filter by tag to find them quicker.
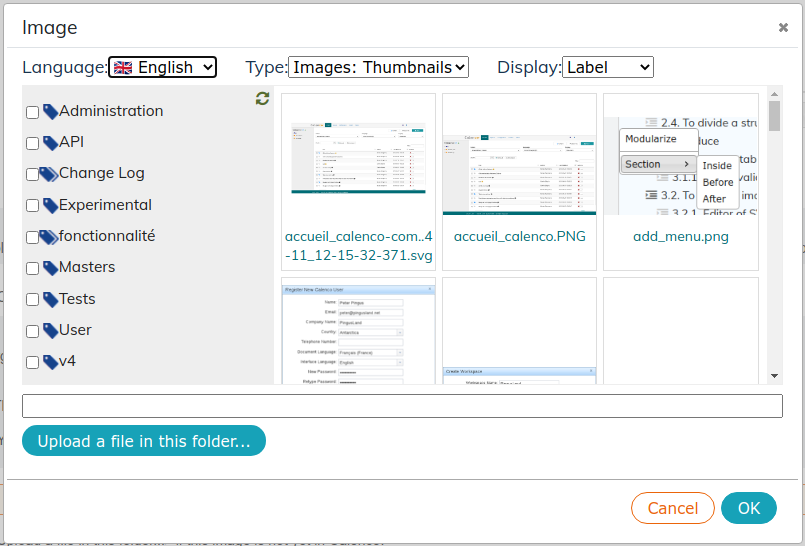
Click on if this image is not yet in Calenco:
Uploaded images will be associated with tags selected when uploading.
You can also upload an image in Calenco from the editor:
Open the image to embed on your computer.
Copy the image in the clipboard (right-click on Ctrl+C).
Paste (Ctrl+V or Cmd+V for users on macOS) the image in the area for editing.
Choose the place where to insert the image.
The image is saved in the language of the document.
The imported text retains its original structure in accordance with the levels of titles present in the original document.
3.2.1. Illustration editor
The illustration editor lets you create (see Create an annotated image) and edit images in SVG format.
To access the editor from an image, click under the image name:
A new window appears:
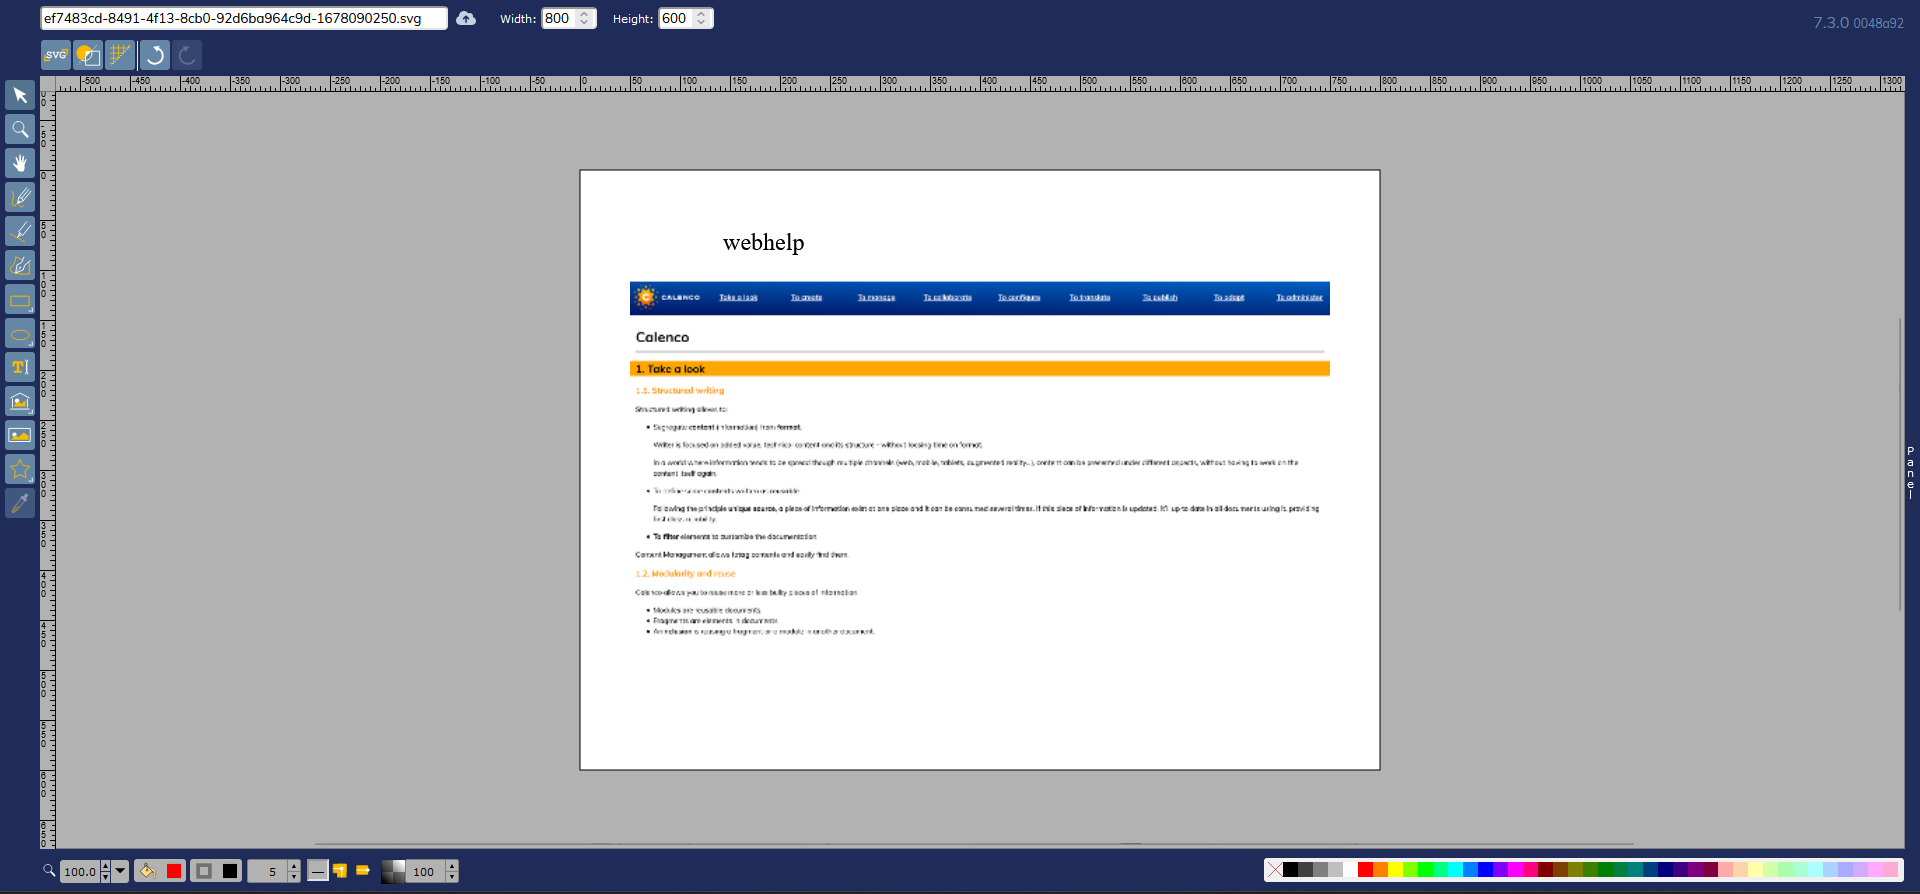
The following features are available in the icon bar on the left:
 |
|
| Translation |
|---|---|
The texts written with the drawing editor are supported by the translation tools: each text element is a translation segment. |
3.3. To create equations
An equation is created with the menu → .
Click on the element containing a question mark
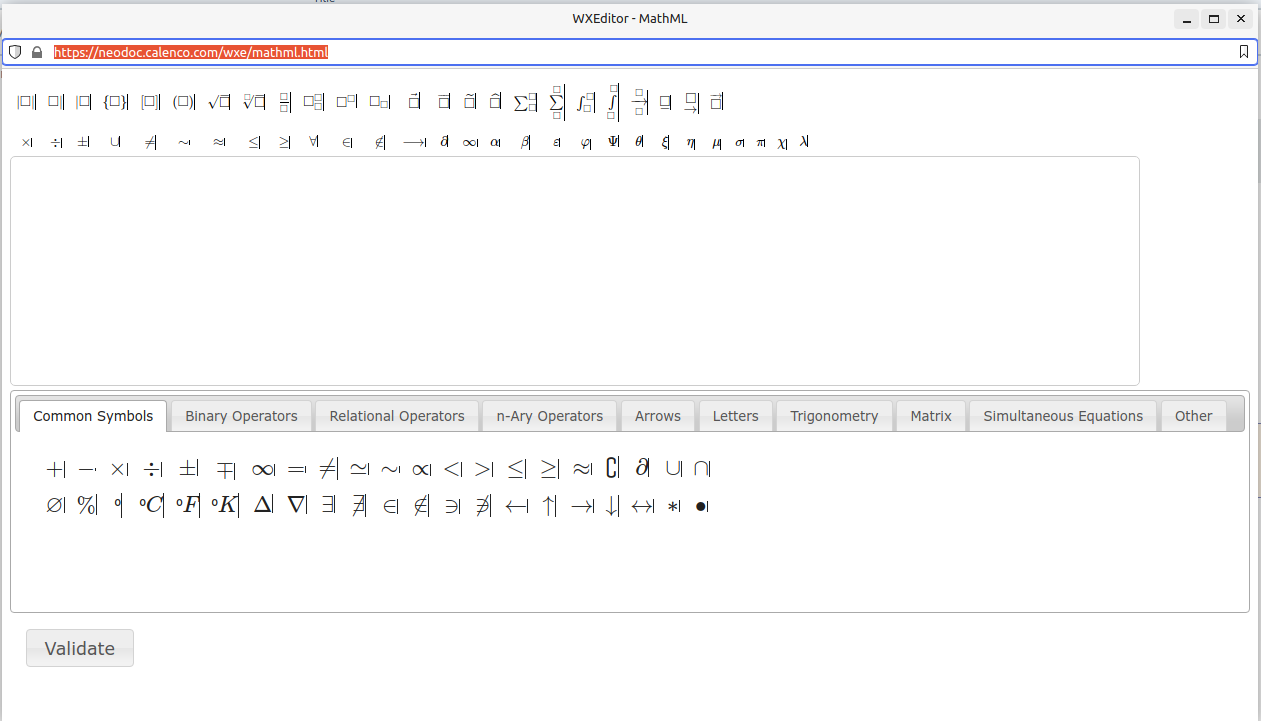
Build the equation with the different features.
Click on the equation to edit.
3.4. Create a bibliography
There are several methods for creating a bibliography.
Procedure 15. Creation in the Calenco interface
Click on
 Create.
Give a title to the bibliography.
Choose the
bibliographyelement in :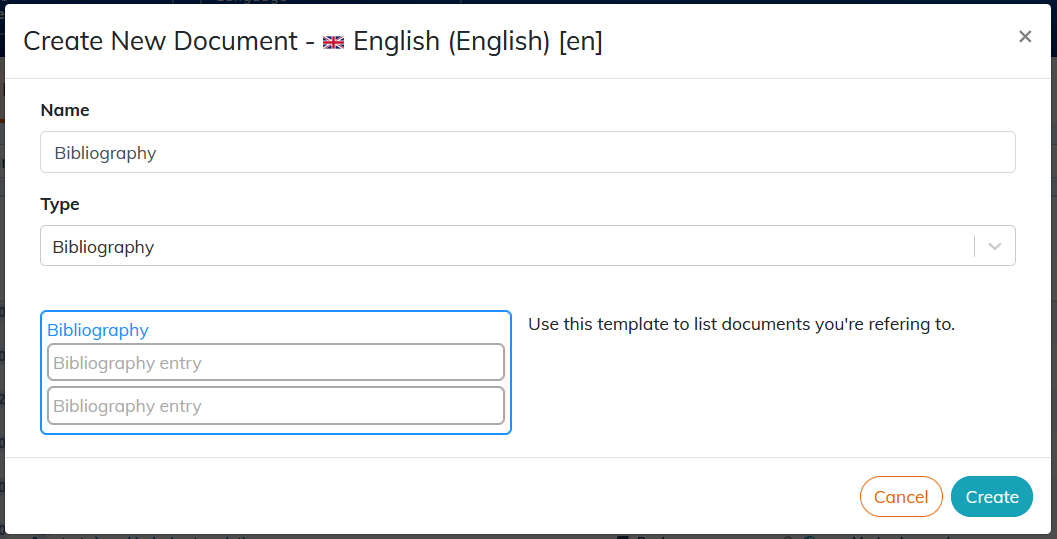
Click on : the content editor opens the bibliography created in a new tab.
Procedure 16. Creation in an existing document
Open the document.
Click on the → menu.
Add the
bibliographyelement.
3.4.1. Edit a bibliography
The bibliography is made up of the bibliographic entry elements.
When created, the bibliographic entry element is composed of a few default elements: author, reference, bibliographic identifier, title, abstract etc.
It is possible to compose an entry from the combination of relevant items for a bibliography. These items are found in the → menu (To customize).
A bibliographic reference makes it possible to make the link between the bibliographic entry and its reference in the text.
Place your cursor where you want to insert the bibliographic reference.
Click on the → menu:
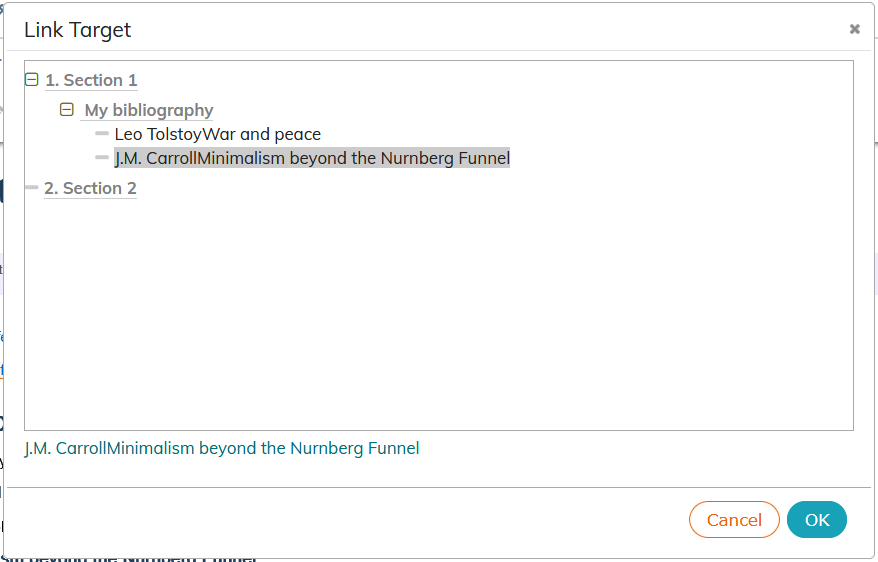
The link between the reference and the bibliographic entry is made via the identifier of the latter.
If the bibliographic entry does not have an identifier, Calenco generates one.
3.4.2. Reuse a bibliography
The bibliography can be modularized from the editor if it is created in an existing document To modularize content.
![[Warning]](cco-warning.svg) | |
If the bibliography is modularized, only identified bibliographic entries are visible and selectable. |
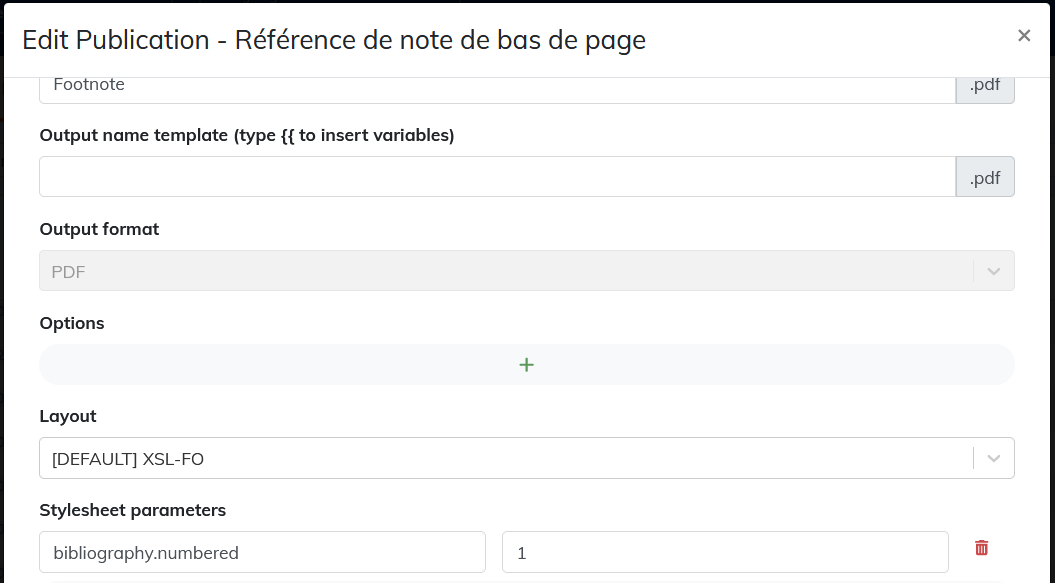
3.4.3. Publish a bibliography
It is recommended to set the publication with bibliography.numbered = 1 to publish a number corresponding to each bibliographic reference.
| |
A customization of the publication style sheet makes it possible to publish only the bibliographic entries cited in the document. Please contact your usual NeoDoc contact ( |
3.5. Create a glossary
There are several methods for creating a glossary.
Procedure 17. Creation in the Calenco interface
Click on
Create.Give a title to the glossary.
Choose the
glossaryelement in :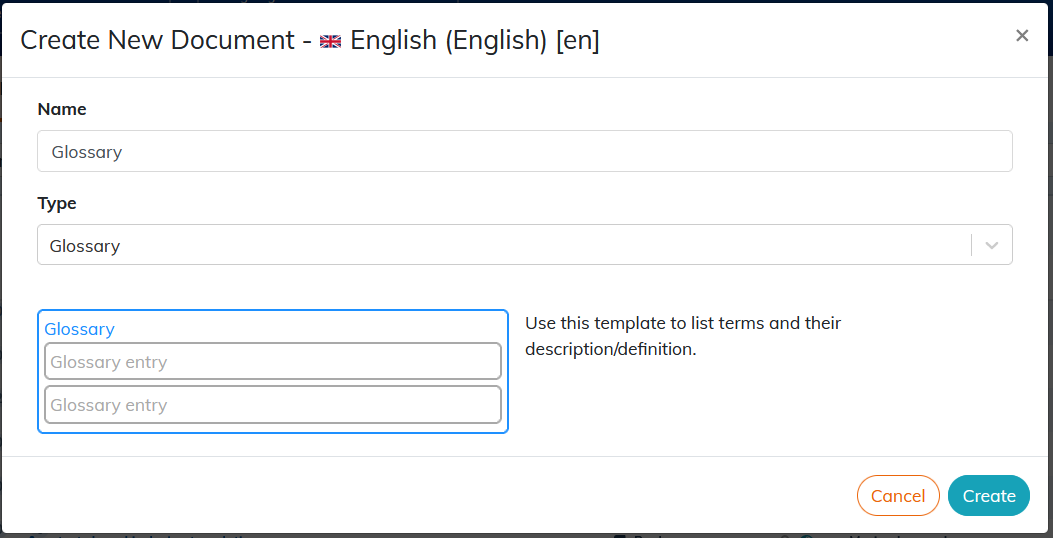
Click on : the content editor opens the created glossary in a new tab.
Procedure 18. Creation in an existing document
Open the document.
Click on the → menu.
Add the
glossaryelement.
Procedure 19. Creation of an automatic and filtered glossary
Open the document.
Click on the → menu.
Add the empty
glossaryelement.In the → menu (in the left area of the editor) place “auto”.
Retrieve the url link of the glossary created beforehand, modify it by deleting a part:

Place the link in the
glossary.collectionpublication parameter (Publish a glossary).Glossary terms that are not cited in the document are not published.
3.5.1. Edit a glossary
The glossary consists of entry elements.
On creation, the input element is composed of the elements: term, definition.
It is possible to add other optional elements. These items are found in the → menu (To customize).
Using the term element for words or groups of words in the text of the document allows reference to glossary entries.
Select the text to set as a term.
Click on the → menu.
Content defined as
termappears in italics in the publication.
3.5.2. Reuse a glossary
The glossary can be modularized from the editor if it is created in an existing document To modularize content.
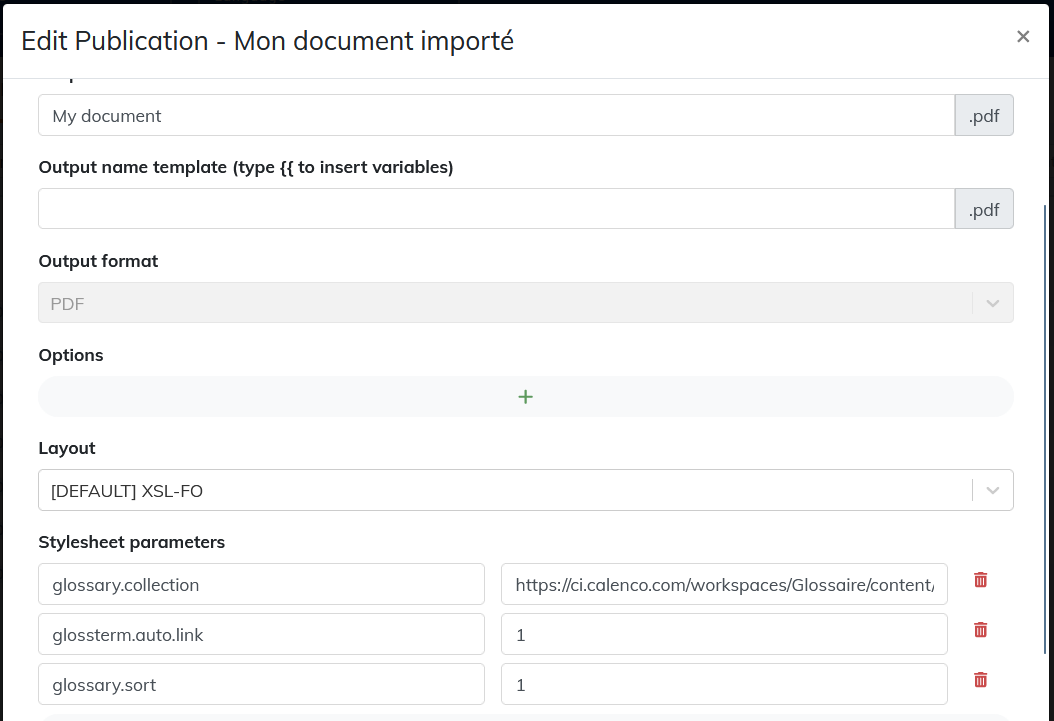
3.5.3. Publish a glossary
Using the glossterm.auto.link = 1 parameter creates a link between the word defined as term in the text and the corresponding entry in the glossary.
Using the glossary.sort = 1 parameter will publish glossary terms in alphabetical order.
Using the glossary.collection parameter allows you to publish only the terms cited in the document (Procedure 19, “Creation of an automatic and filtered glossary”).
3.6. To add a title
Titles are mandatory for structure elements.
In structured documentation, using a title when possible is strongly advised.
Click on contextual menu of the element or in the icon bar → → .
3.7. To specify information
The information element, located at the very beginning of the document, allows you to store information that is sometimes not published (author's name, reference number, product identifier, table of revisions, etc.). The commonly used elements are available in the menu .
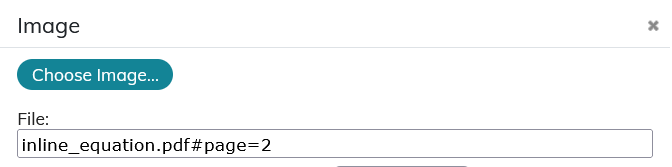
3.8. To insert a page of a PDF file
A page of a PDF file can be referenced for publication as an image.
A PDF must be stored in Calenco in the appropriate language.
| |
Once imported, the PDF file is only visible by administrators. |
Syntax to point to the page is the following: file name.pdf #page=page number
3.9. To integrate audio or video
A PDF publication is not appropriate to integrate video and Calenco is not the place where your contents are stored.
The most effective way is to refer to a web address where the recording is stored and accessible to the target audience:
Click on the → menu.
Insert the full url link in the
filerefattribute.
Videos are published as a link (for PDF publications) or in an online player (for HTML publications).
3.10. To migrate content in Calenco
Select the text from the source file, such as a Word document or a web page.
Copy it (Ctrl+C).
Paste it in the editing area where needed (Ctrl+V).
Imported text keeps its original structure.
To paste the text without formatting, use the shortcut Shift+Ctrl+V.
3.11. Insert a cross reference
A cross reference allows you to make a link in the document to another part of the same document.
Position your cursor where you want to insert the cross-reference.
Click the → , or use the quick tools on the left:
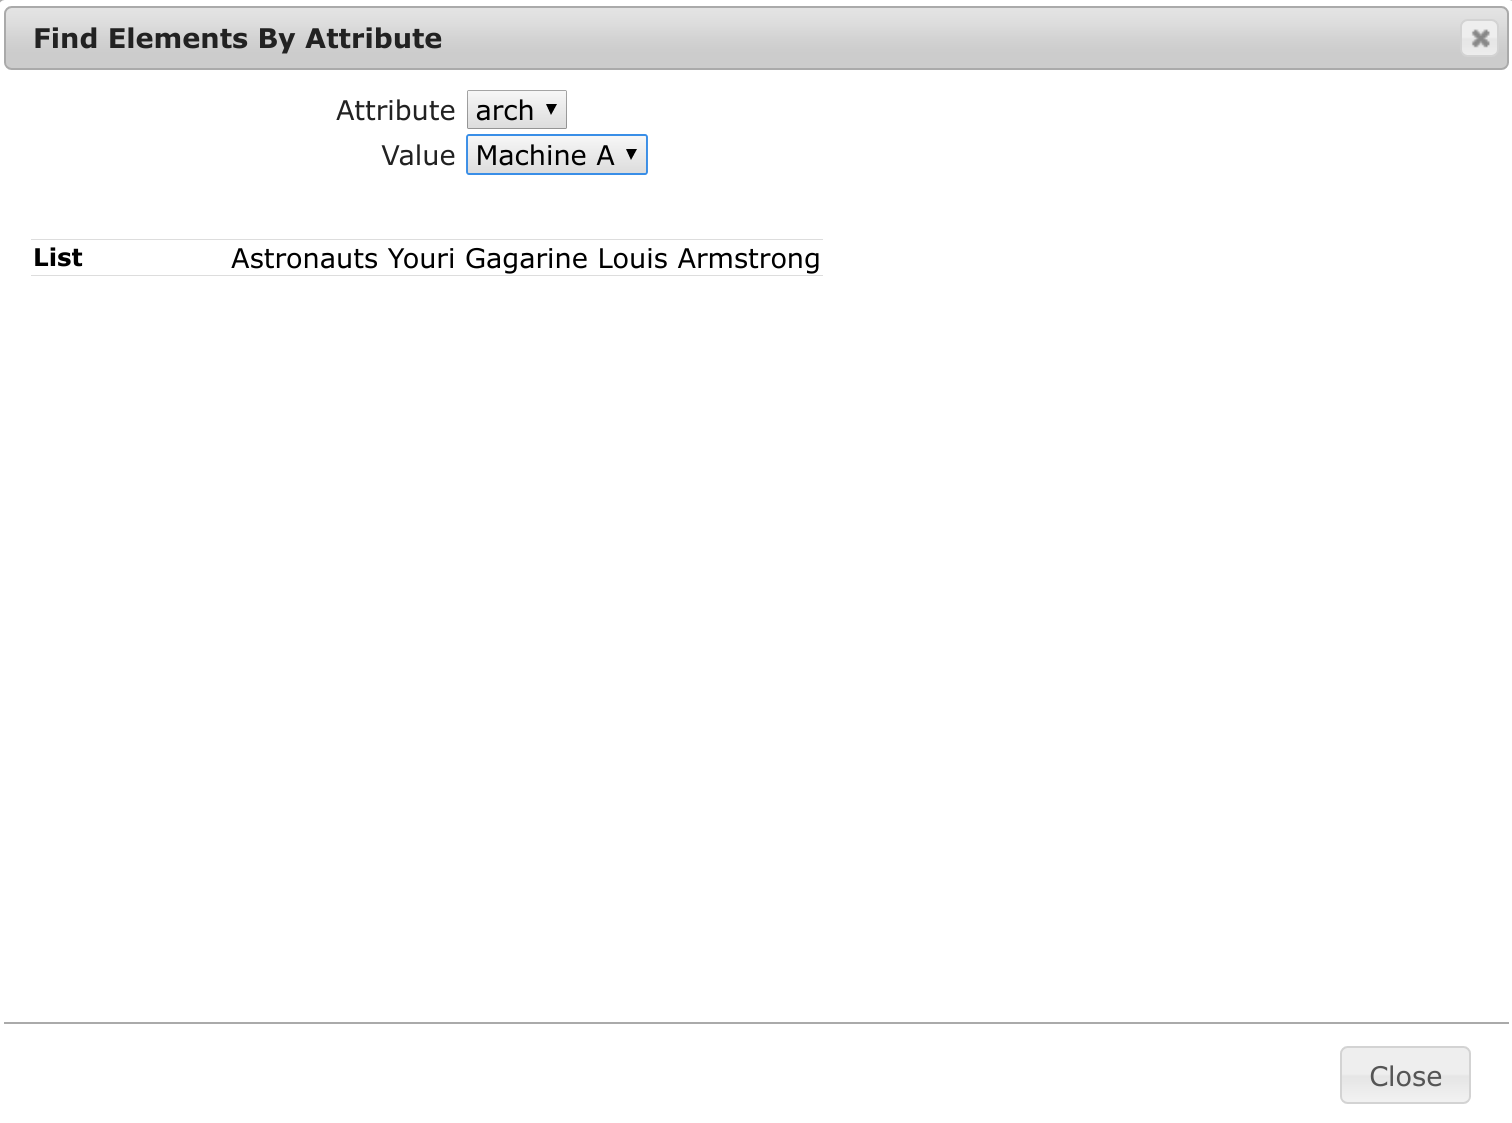
The target elements with a title are listed in the dialog box that appears:
Learn how To add a title
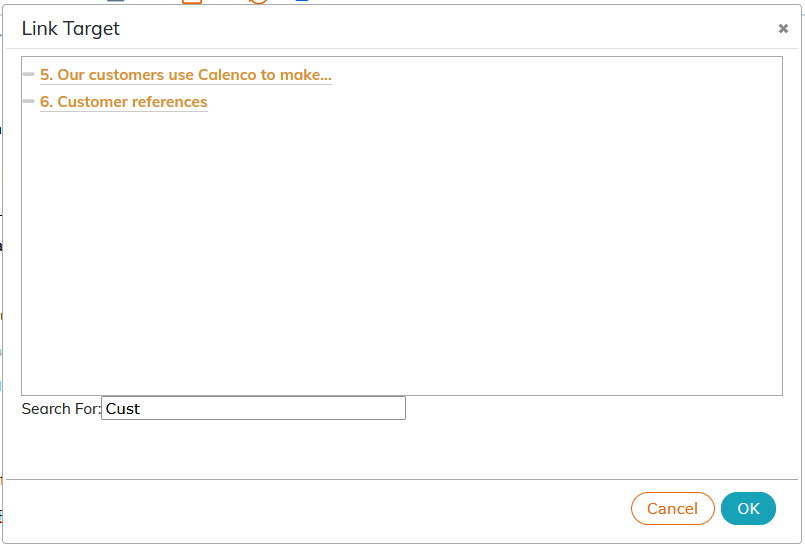
Titles without an identifier appear in gray with a floating message and are not clickable.
If you want to refer to an element which is not listed, click on .
Make sure that the target element is identified (To identify).
Click on
"_specify_"to open this dialog:
Click on to show the list of identified elements in the document:
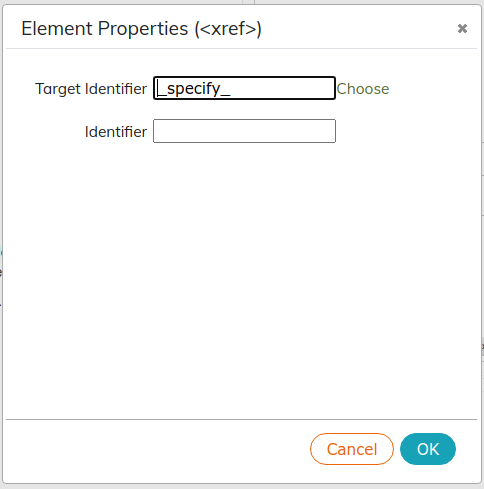
Select the target identifier.
3.12. Insert an external link
An external link makes it possible to make a reference to a web address.
Select the content for which you want to insert the external link.
Click on → → . A dialog box opens asking you to insert a url link in the dedicated field:
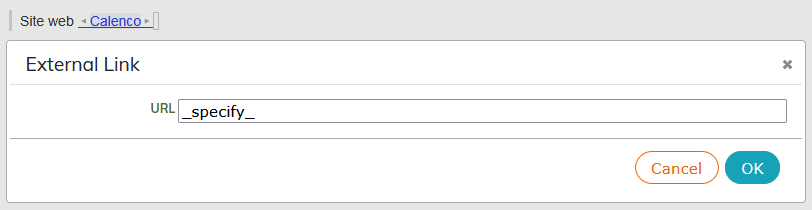
Validate with OK.
The link is automatically placed in the
hrefattribute: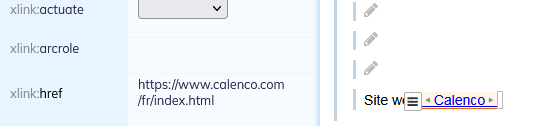
3.13. Adapt content (cut/copy/paste)
Select the element.
Use standard shortcuts (Ctrl+ or Ctrl+ and then Ctrl+) to move or duplicate content.
| Multiple content selection |
|---|---|
Click on the vertical bars of the elements to select maintaining the key Shift pressed. You can only select several elements at the same level of structure. |
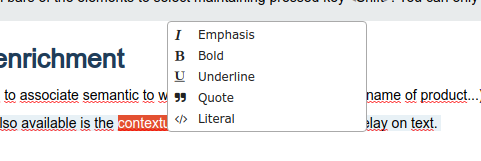
3.14. Text enrichment
The menu allows associating semantics to words (element of user interface, name of product...).
It is possible to define some text enrichment options by selecting a text with the mouse:
| |
Style hierarchy. To make a text in bold italics, it is necessary to place this text first in the |
3.15. Add Hard Page Break
Calenco publishes content following the logic of the style sheet: inserting a manual page break forces the behavior of the publication.
- Select the element before which you want to insert the manual page break.
- → .
3.16. Insert a list
Calenco offers three types of lists ( ):
- Bulleted list: bullet characteristics are managed by the style sheet.
- Ordered list: the type of numbering (numbers, letters, other) is managed by the style sheet.
- List of definitions.
| |
Continue numbering an ordered list. To continue numbering with the index following the last index of a previous list, the 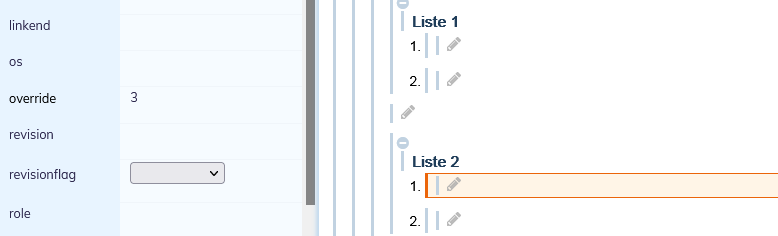 |
3.17. Insert a footnote
Position your cursor where you want to insert the footnote.
Click the → menu.
Type the text in the dedicated area.
It is possible to make a reference to the footnote in a document.
Position your cursor where you want to insert the cross-reference.
Make sure the target footnote is properly identified (To identify).
Click the → menu:
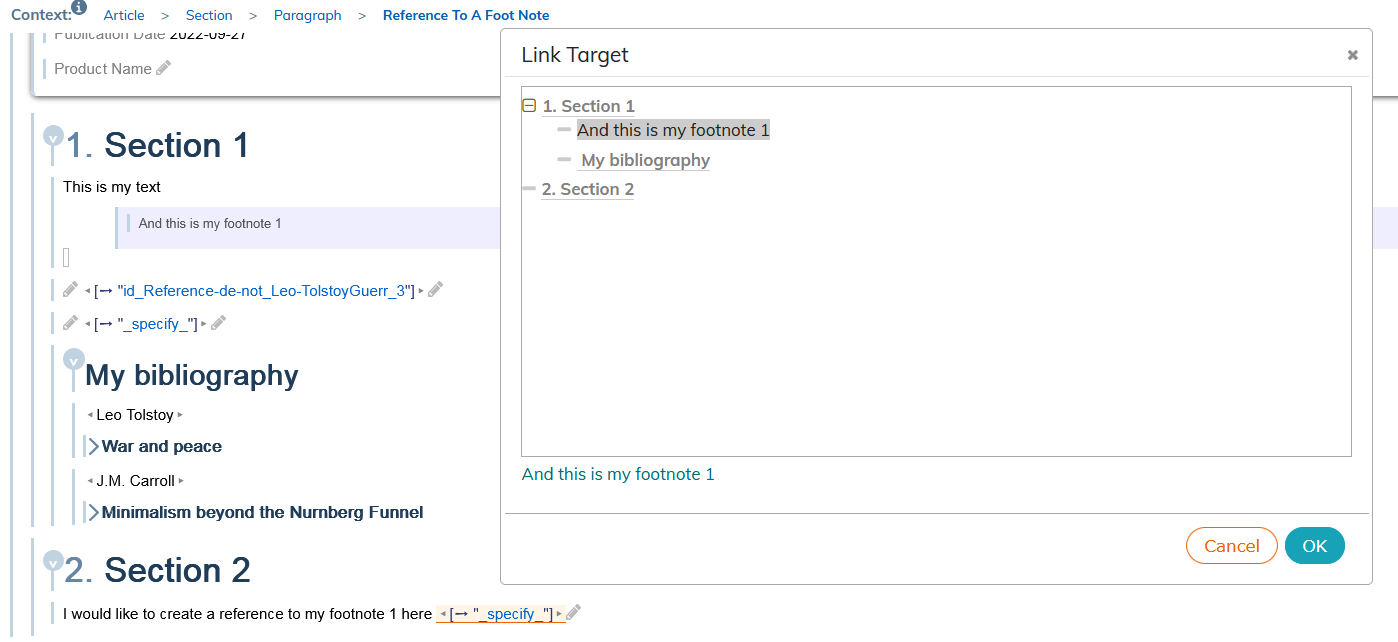
Select the desired target and validate.
4. To identify
Identifying an item is useful for reusing or referencing it.
There are several methods to identify an element:
Edit properties of the element and manually enter an identifier:
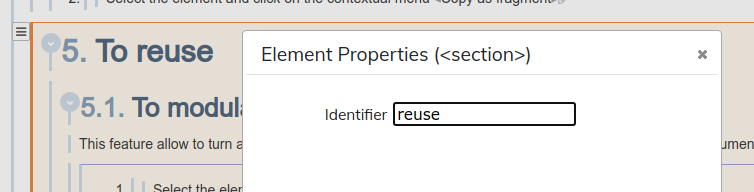
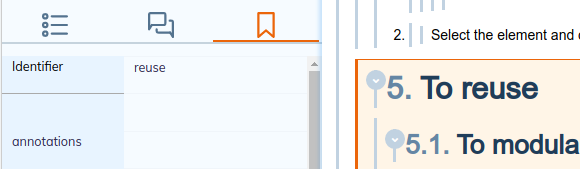
- Select the element and click on the contextual menu .
5. To reuse
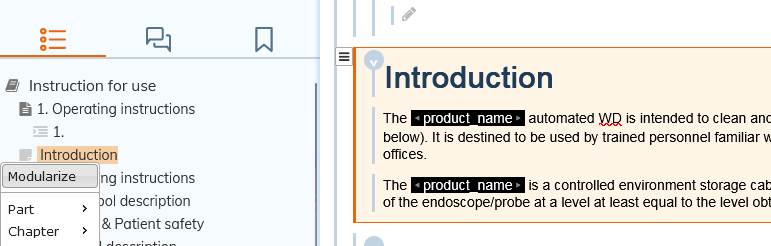
5.1. To modularize content
This feature allows taking an element (section, chapter, part) from your document to reuse it in other documents.
Select the element to modularize;
Click :
either in the Context with a right click on the selected element;
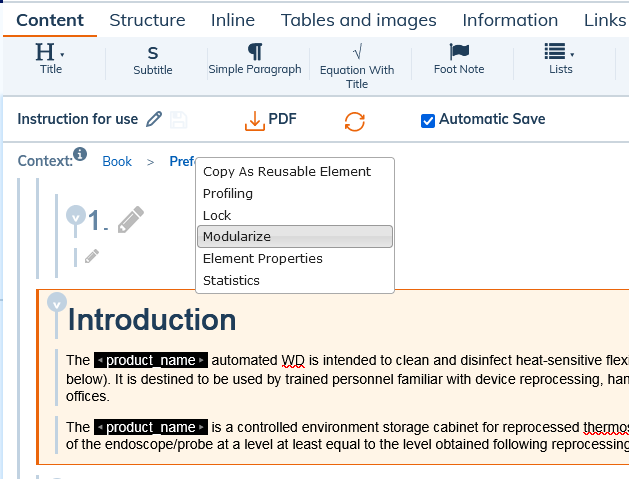
either in the table of contents with a right click on the selected element.
A new file is created in Calenco with this element and its content, in the language of the current document.
Background color highlights the inclusion.
To modify a module, right-click on the inclusion and click on .
5.2. To reuse contents
5.2.1. To reuse modules
The modules (Chapter, section, appendix etc.) do not need to be identified to be reused.
There are several ways to reuse modules.
Procedure 20. Method 1
In the editor, select the module to reuse.
Click on then on .
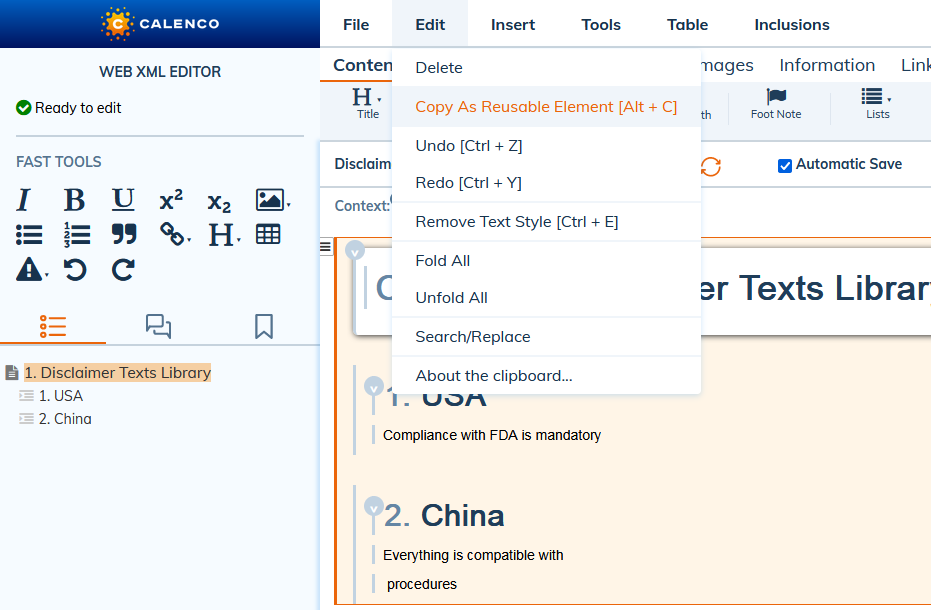
In the target document, indicate the insertion point and bring the inclusion with Ctrl+V.
Procedure 21. Method 2
In the editor, select the module to reuse.
In the Context, right click on the name of the selected element and click on .
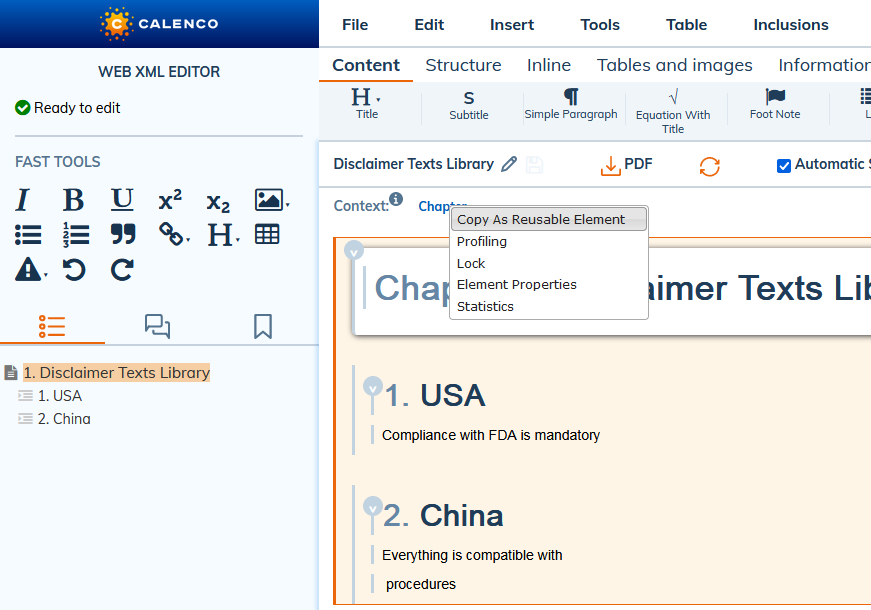
In the target document, indicate the insertion point and bring the inclusion with Ctrl+V.
Procedure 22. Method 3
In the target document, click
 at the top right in the header to select a module.
Select the desired module and click OK.
It is possible to filter files thanks to tags.
The drop-down menu Display allows showing name or label of files.
In a new window that opens, click on the element and indicate the insertion point.
Insert the element using the arrow system Table 1, “Insert options”.
5.2.2. To reuse fragments
Elements as content fragments (single paragraph, image, table etc.) must be identified to be reused.
There are several methods of reusing fragments.
Procedure 23. Method 1
| |
Make sure that the element to be reused is well identified (To identify). |
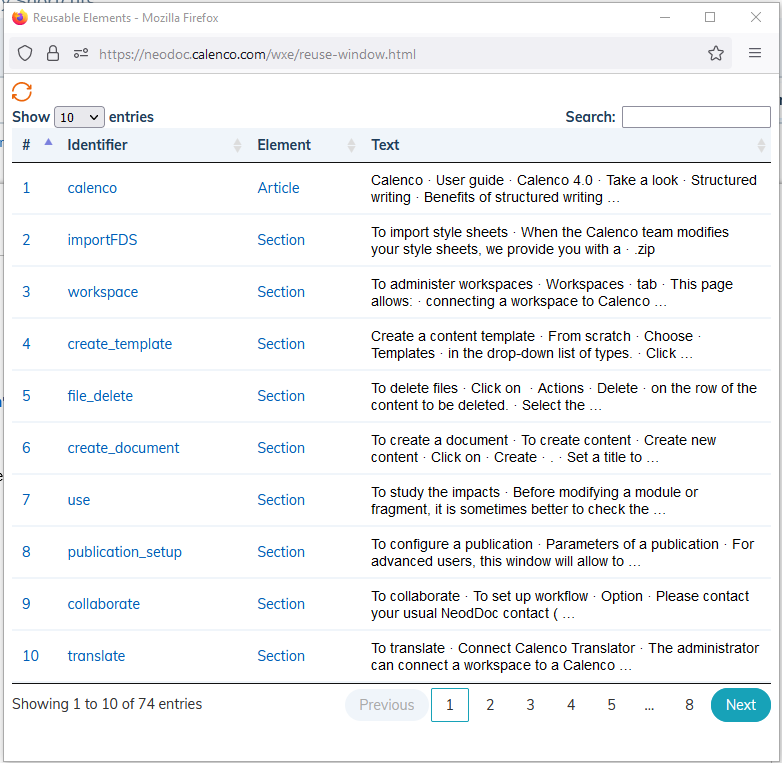
In the target document, click
at the top right in the header to select a file containing reusable content.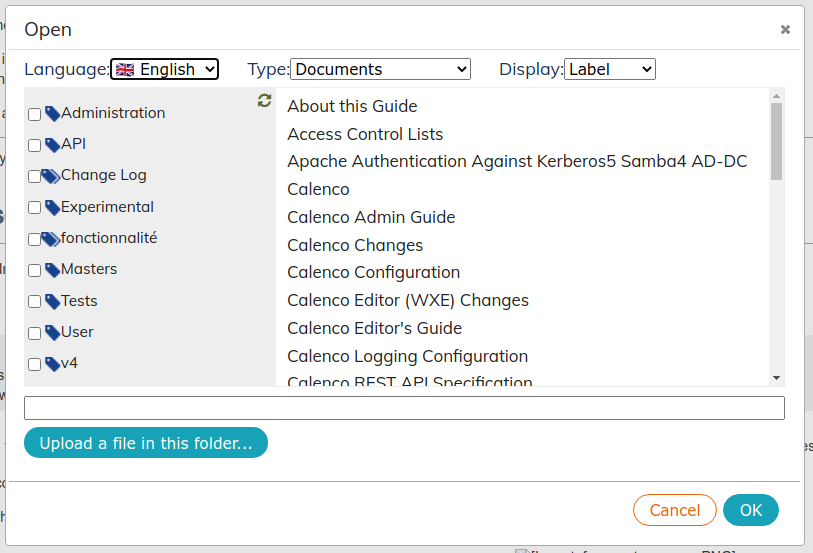
It is possible to filter files thanks to tags.
The drop-down menu Display allows showing name or label of files.
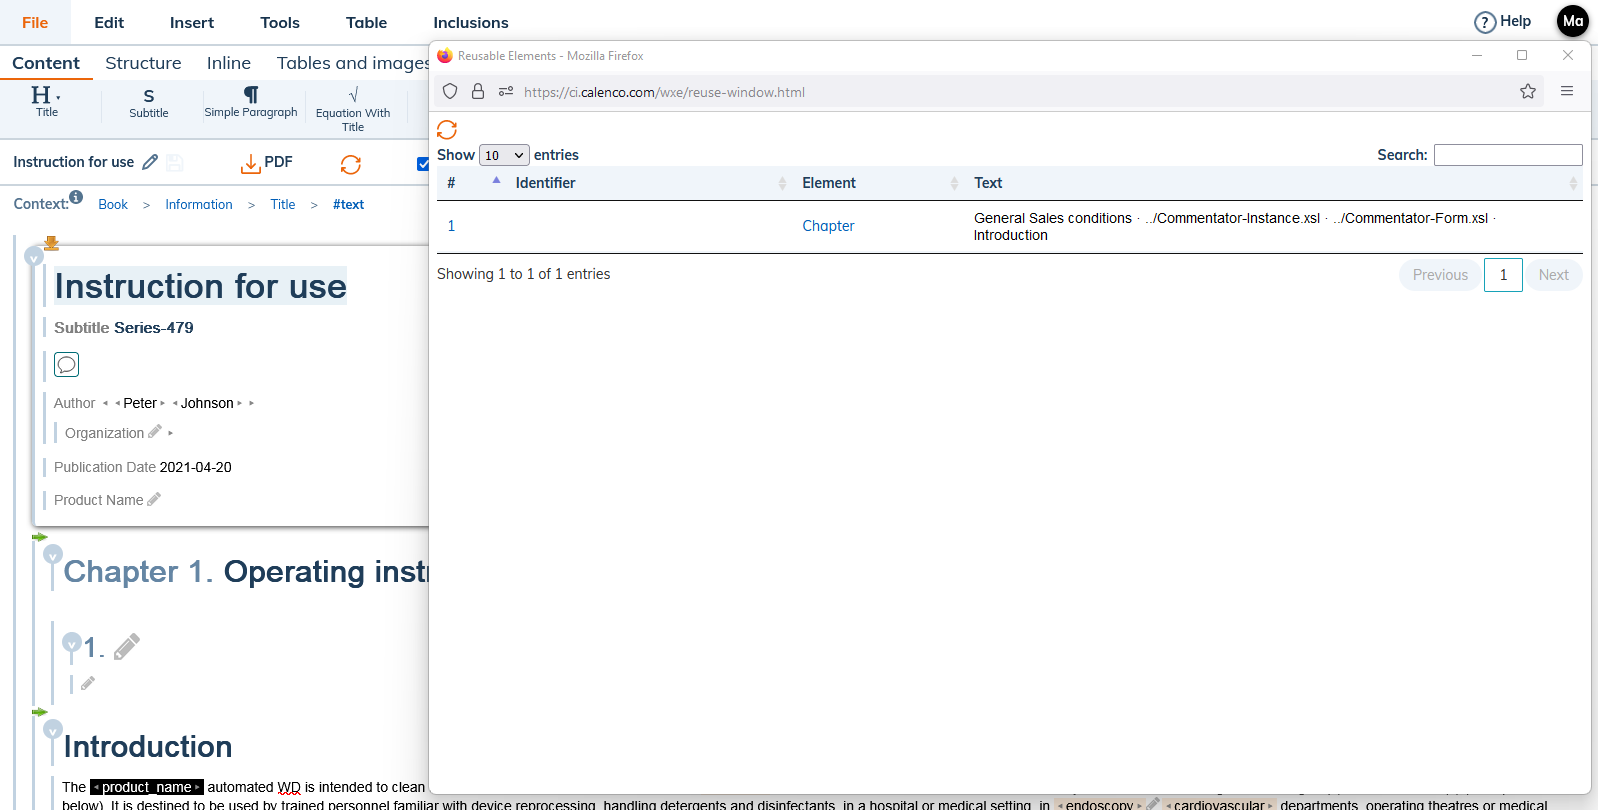
Select the file and click on OK. A new window appears:
If the file contains a lot of reusable elements, you can filter them.
Click the element and specify the insertion point. Insert the element using the arrow system Table 1, “Insert options”.
Click on
 Refresh to update the list of items.
6. To configure
A parameter allows using a value at different places in a document.
The value of the parameter is used when publishing: configuring content allows to maximize their reuse.
To insert a parameter:
Specify an identifier on the element containing the text to reuse. This is often an element of the document header such as a product name, version number, etc.
Place the cursor where you want to insert the parameter.
Click on → .
Set the identifier (To identify) of the variable, in the black background of the element.
6.1. To calculate
A calculation can be inserted with the feature → .
To edit the formula, click on the “Σ” sign.
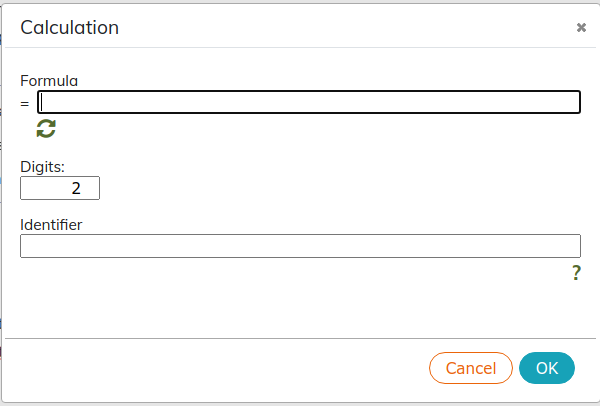
Content of the dialog box
- You may assign an identifier to this calculation. This will potentially allow you to reuse its result in another calculation.
A clickable list of variables that can be referenced in the formula.
For an element to appear in this list, the following conditions must be met:
- The element must contain a number. Note that for greater flexibility, non-numeric characters are ignored. As an example, text “12 €” is identified as the number 12.
- The decimal separator (if present) must correspond to the language declared on the root element of the document (for example the comma for French).
- The element must have an identifier (just declare it as a reusable element for that).
- A text field to enter the calculation formula.
- Below this text field there is a button
 for testing the formula.
 - A field for specifying the number of decimal units for the result.
| Update calculations |
|---|---|
Formulas are evaluated in real time as the base numbers are being changed in the document. Use the icon to refresh the document |
6.1.1. Syntax
When writing the formula, the numeric constants must be written in the imperial format (the decimal point must be ".").
6.1.1.1. Operators
+: Addition-: Subtraction*: Multiplication/: Division%: Modulo
6.1.1.2. Functions and constants
Table 2. Constants
|
Constant |
Description |
|---|---|
|
E |
Euler's number, the base of natural logarithms, about 2.718. |
|
LN2 | Natural logarithm of 2, approximately 0.693. |
|
LN10 | Natural logarithm of 10, approximately 2.302. |
|
LOG2E | Base logarithm 2 of E, approximately 1.442. |
|
LOG10E |
Base 10 e logarithm, about 0.434. |
|
PI |
Quotient of the circumference of a circle by its diameter, about 3.14159. |
|
SQRT1_2 |
Square root of 1/2; equivalent of 1 on the square root of 2, about 0.707. |
|
SQRT2 |
Square root of 2, about 1.414. |
| Precision |
|---|---|
The precision of mathematical functions depends on implementation. This means that different browsers may provide different results. One can even have a single JavaScript engine that, on different architectures and/or operating systems, provides different results. |
Functions
- abs(x)
Returns the absolute value of a number.
- acos(x)
Returns the cosine arc of a number.
- acosh(x)
Returns the hyperbolic cosine arc of a number.
- asin(x)
Returns the sine arc of a number.
- asinh(x)
Returns the hyperbolic sine arc of a number.
- atan(x)
Returns the tangent arc of a number.
- atanh(x)
Returns the hyperbolic tangent arc of a number.
- atan2(y, x)
Returns the tangent arc of the quotient of its arguments.
- cbrt(x)
Returns the cubic root of a number.
- ceil(x)
Returns the smallest integer greater than or equal to the value passed as a parameter.
- clz32(x)
Returns the number of zeros that prefix a 32-bit integer.
- cos(x)
Returns the cosine of a number.
- cosh(x)
Returns the hyperbolic cosine of a number.
- exp(x)
Returns the exponential of a number (i.e. Enumbr) with E the Euler constant (2.718...).
- expm1(x)
Returns the result of 1 minus the exponential of a number.
- floor(x)
Returns the largest integer less than or equal to the value passed as a parameter.
- fround(x)
Returns the 32-bit floating point number closest to the argument.
- hypot([x[,y[,...]]])
Returns the square root of the sum of the squares of the arguments.
- imul(x, y)
Returns the result of 32-bit integer multiplication.
- log(x)
Returns the natural logarithm (lodge) of a number.
- log1p(x)
Returns the natural logarithm of 1 + a number.
- log10(x)
Returns the logarithm at base 10 of a number.
- log2(x)
Returns the logarithm at base 2 of a number.
- max([x [, y [, ...]]])
Returns the largest value of a list of numbers.
- min([x [, y [, ...]]])
Returns the smallest value of a list of numbers.
- pow(x, y)
Returns the calculation of x to the power y (x is the base and y is the exponent).
- random()
Returns a pseudo-random number between 0 (inclusive) and 1 (excluded).
- round(x)
Returns the rounding of a number.
- sign(x)
Returns the sign of a number, indicating whether it is positive, negative, or zero.
- sin(x)
Returns the sine of a number.
- sinh(x)
Returns the hyperbolic sine of a number.
- sqrt(x)
Returns the square root of a number.
- tan(x)
Returns the tangent of a number.
- tanh(x)
Returns the hyperbolic tangent of a number.
- trunc(x)
Returns the integer part of a number (the decimal part is removed).
6.1.1.3. Variables and functions in a table
If a calculation is inserted into an array, its formula can reference the numerical values present in the array. The cells in the table are identified by their coordinates. Columns are identified by capital letters. Lines are identified by numbers.
Click on the top left icon ![]() to display coordinates of cells.
to display coordinates of cells.
For example, to add 1 to the number in the cell in the third column, second row:
C2 + 1
To obtain the square root of the number contained in the cell of the fourth column, second row:
sqrt(D2)
Sum function. The function sum (sum) has as input coordinates of the first cell and the ones of the last cell, separated by ":". Examples:
sum(B2:B13)
sum(B3:C4)
6.1.1.4. Examples
cos(PI)
Result: -1.
cos(PI) + myIdentifier
Result: 0 if the variable identified by myIdentifier contains text "1".
7. To profile
Profiling makes it possible to specify the “context” relating to a specific content, the “profile” of this information. For example on the maintenance manual of a vehicle, a chapter can be specific to a variant (heat engine, electric or hybrid). Or even to specify that some information is confidential.
This makes it possible to manage all the variants of the same document from a single source, while leaving the possibility of generating a final publication for each variant.
Another use of this functionality is to modify the layout according to the profile of the information (confidential information will be framed in red for example).
Prepare profiling by reading To customize attributes.
7.1. To profile contents
To condition the publication of a content or specify it so that a specific treatment is applied when publishing:
Select the element and use contextual menu :
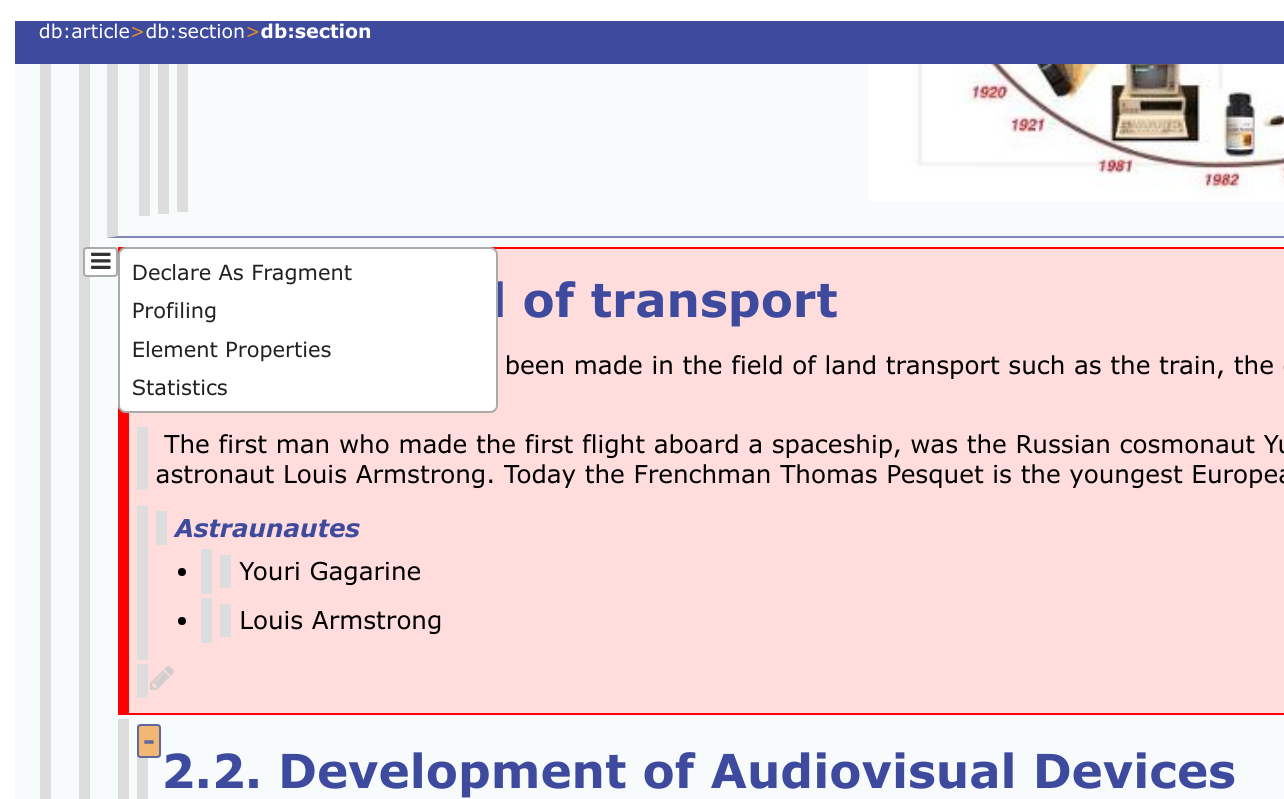
Check the use cases corresponding to the selected content:
| |
You can find the list of profiling attributes in the official DocBook documentation. |
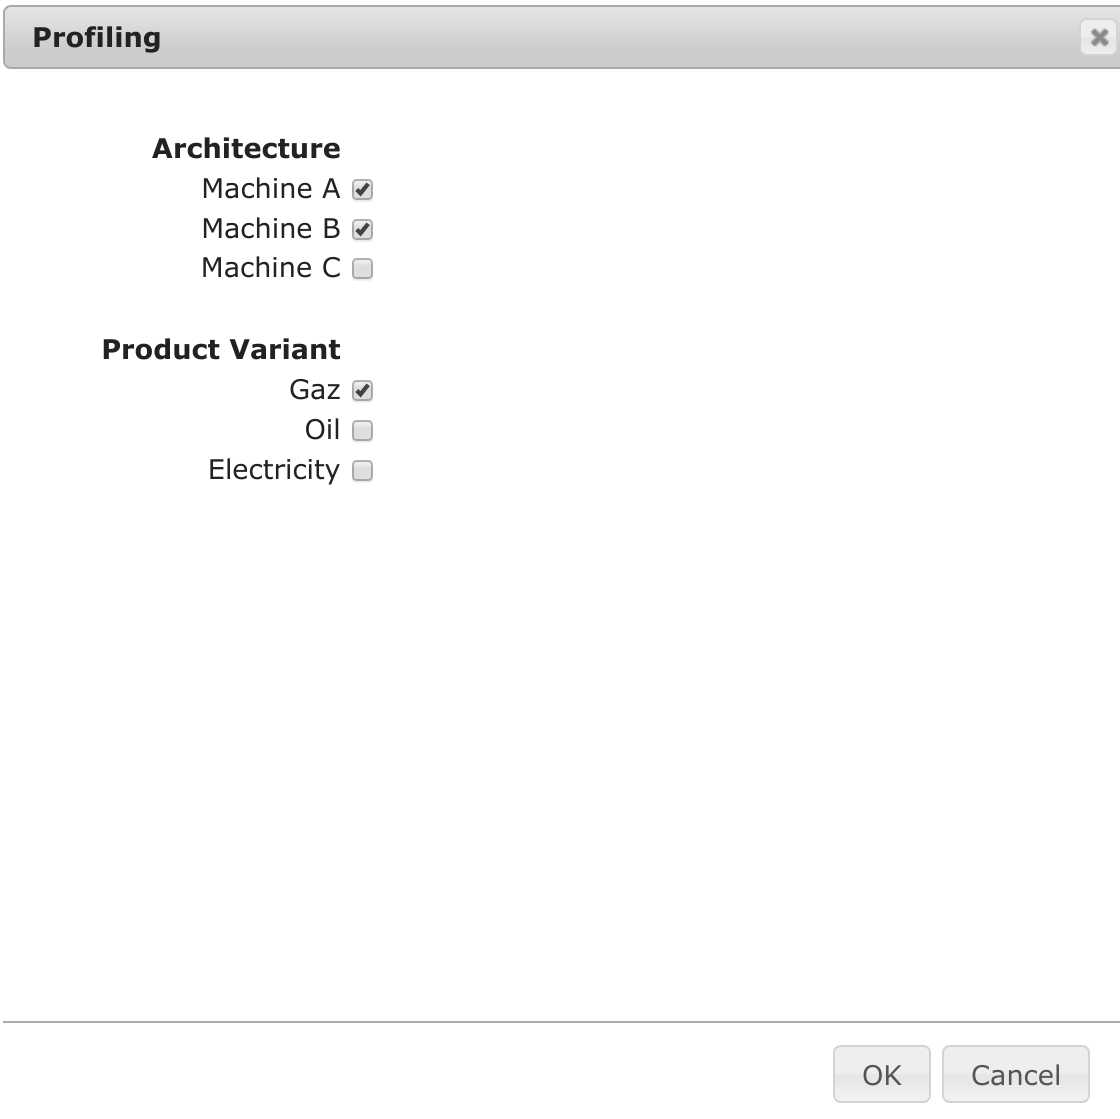
| |
Profiled elements are represented with a colored background. Profiling attributes are indicated in the list of attributes by the same color background: 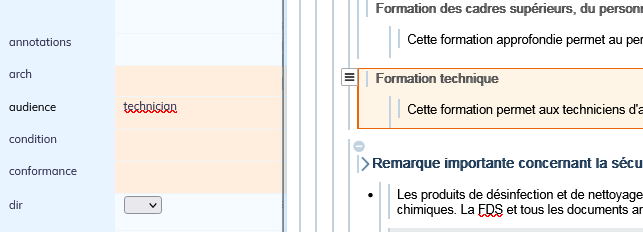 |
| |
It is not always possible to define a list of values for a given attribute. In this case, directly key-in values in the list of attributes or in the dialog if the attribute had been selected to be quickly accessible (see To customize attributes). |
Check out the Content Profiling video:
8. To comment
Calenco has a feature to comment documents, without impact on publication. This is especially useful with workflow, so that each involved user can contribute, without directly impacting the final result.
In the area of content management, you can comment elements to keep track of suggested-only or implemented modifications.

8.1. To create
Select the content you want to comment on and click .
Complete the comment field. The information is saved automatically.
Double click on
 to modify an existing comment.
Click on the gray cross at the top right of a comment to delete it.
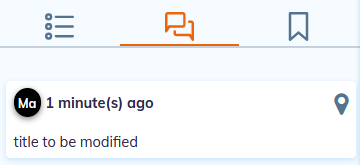
8.2. Locate
Click on
 to open the comments list.
Click on
to locate the desired comment. The content affected by this comment appears on a yellow background for a few seconds.
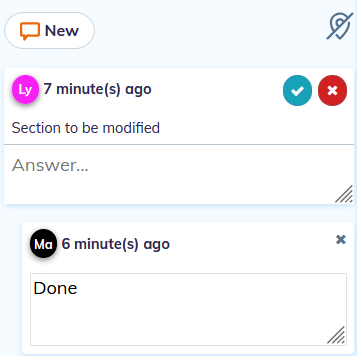
8.3. Interact
Double click on to respond to a comment.
People working on a document can respond to comments in the following ways:
- Click on the status
 to accept the comment,
 - Click on the status
 to reject the comment,
 Answer in the dedicated field if necessary.
9. To collaborate
| |
This feature is an option depending on subscription. Please contact your usual NeoDoc contact ( |
The editor allows collaborative mode of work. Several users can modify simultaneously the same file. Users editing a file are symbolized by a dot with the first 2 letters of the users' first name at the top right of the tab. For example, below Ma and Ly:

When hovering the pointer of the mouse on icons, the email address of the user is displayed in a tool tip.
| |
When several users edit a file, they can modify simultaneously the same element. The presence of one of the users on a content block will gray it out and the gray vertical bar to the left of this block will turn purple, preventing any modification by other users:  |
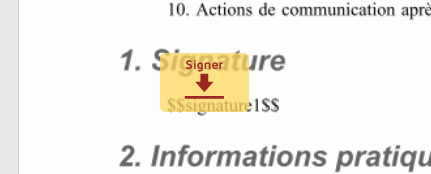
9.1. Electronic Signature
| |
This feature is an option that works in conjunction with the account DocuSign of your company. Please contact your usual NeoDoc contact ( |
Calenco allows a maximum of 5 signatories to electronically sign a document, in connection with DocuSign.
You only need to insert in the text where required the following keywords: $$signature1$$, $$signature2$$, $$signature3$$, $$signature4$$ or $$signature5$$.
10. To manage content
10.1. To modify the label of a file
This feature distinguishes two documents with the same title.
Above Context, click the edit icon to the right of the content name:
Enter the name of the label.
The label of the document is updated.
11. To customize
You can populate the menu with specific elements.
Choose menu →
A search bar helps to quickly filter elements.
Click on icon
 on the right of the element to add in the menu .
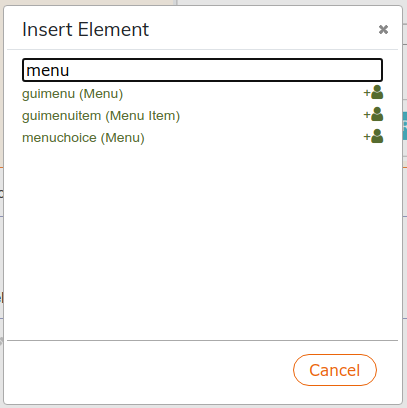
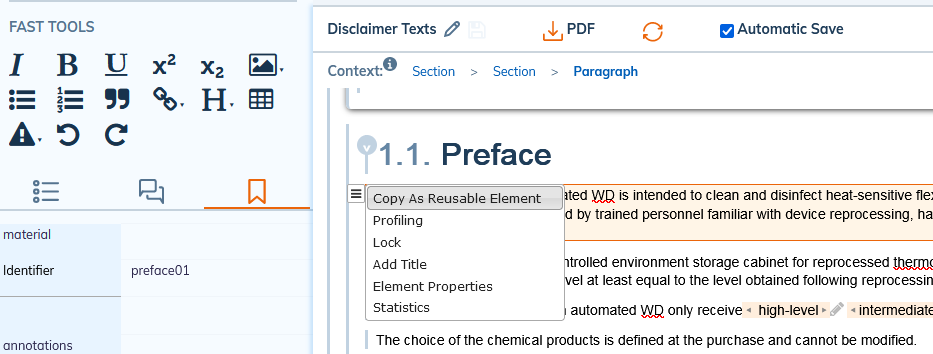
12. To go faster
- Alt+C
- To copy an element as reference
- Ctrl+Alt+C
- Show column specifications
- Ctrl+V
- Paste an element
- Ctrl+Shift+V
- Paste an item in plain text
- Shift+Alt+V
To copy the reference of an element with choice when inserting
This feature is mandatory when pasting a reference near an inclusion.
- Alt+Wheel
- To fold and unfold the table of content.
- Ctrl+I
- To promote a title in the structure of the document.
- Ctrl+U
- To demote a title in the structure of the document.
- Ctrl+B
- If possible, divide the structure element from the cursor into two structures of the same type.
- Ctrl+E
Remove inline tags.
Transforms an
inlinemediaobjectinto amediaobject.- Ctrl+Backspace
- Deletes whole words to the left of the cursor.
- Tab
- Create a list on the current paragraph or add the paragraph to the previous list.
- Tab+Shift
- Moves the paragraph up one level in a bulleted list.