Administration
User guide
1. To administer
There are five Calenco user roles:
Customer Account Manager can:
- manage the subscription,
- add or remove licenses,
- assign rights,
- view invoices,
- create new workspaces,
- create Calenco Translator connectors,
- add languages to the workspace.
- clean up the version history for all documents in the space.
- Workspace administrator: can create publications, manage workflows, create content, etc.;
- Editor: can create and update documents and content;
- Reviewer: can access documents in read-only or comment mode via tasks assigned to him as part of a workflow.
- Operator: can access the interactive forms to which it is associated (seeSet a role to a user).
2. To manage customer account
2.1. License subscription
2.1.1. Calenco Licenses
There are two types of license depending on the duration of the commitment: monthly or semi-annual subscription.[4]
2.1.2. Subscription
|
 | |||
|
 | |||
|
 | |||
| ||||
|
 | |||
[a] For annual or specific invoicing, contact [b] If unable to make payment by credit card, contact | ||||
2.1.3. Login
|
 |
Consult the Calenco online help for details on the administration of the customer account, management of user accounts and the workspace.
2.2. Manage licenses
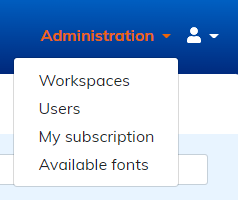
The customer account manager accesses the management interface via the → menu.

S.he can:
- change current subscription options and add or remove licenses;
- change offer;
- fill in billing details and payment information;
- find the invoices.
![[Caution]](cco-caution.svg) | |
Deletion of licenses. The deletion of licenses in My subscription will only be taken into account if the respective users are disabled beforehand from the menu:  |
3. To administer accounts
Accessible from the menu, this page lets the customer account manager manage user rights for a workspace.

3.1. To create a new user account
Select the workspace:

- Click on .
![[Note]](cco-note.svg) | |
An administrator cannot create more accounts than subscribed licenses. If the creation fails, you may need to close accounts or subscribe new licenses (refer to Manage licenses). The customer account manager can subscribe to new licenses. |
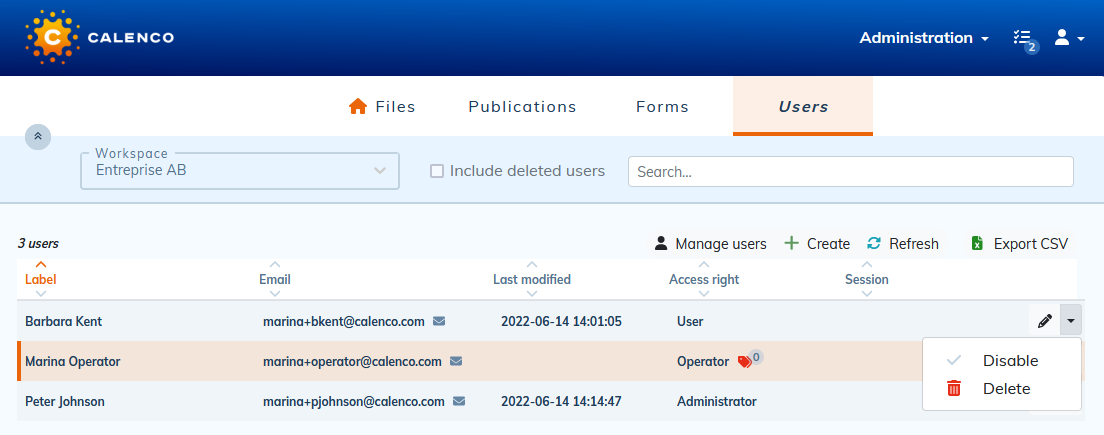
3.2. Set a role to a user
| |
The account manager can download the list of users of a workspace in CSV format. |
User accounts are configured per workspace through the tab .
Manage user access
Select the workspace:
Click on at the top right of the screen:

A new window appears:

- Select users in the list and set the appropriate role.
- Associate the user with the Operator role to one or more interactive forms by clicking on
 to the right of the role and checking the necessary labels.
3.3. Delete a user account
The customer account manager can delete one or more user account(s).
![[Important]](cco-important.svg) | |
It is the customer's responsibility to ensure that unused accounts are deleted for security reasons. |
From the menu, click on the menu.
Select the workspace:
Delete the necessary users.
Preview of deleted accounts is available by checking Include deleted users.
In compliance with the GDPR, information about the deleted user is anonymized.
From the menu, click on the menu.
Click . Remove the number of deleted users (depending on their role: editor and/or reviewer). Confirm the action.

3.4. To kill a session
Each connection to Calenco is linked to a working session. This session is unique and nominative. It is therefore not possible to simultaneously open a session in different browsers for a given user.
You can log out and end your active session like this:

| Force logout |
|---|---|
Account managers can view a list of active sessions on Calenco and close a specific session if necessary. |
4. Add a new workspace
The customer account manager can create additional workspaces.
From the menu, click on the menu.

Click on
 Create.
| |
By default, the workspace name is your company name and/or department name if applicable. The name of the workspace cannot be changed after validation. |
![[Tip]](cco-tip.svg) | |||
If you absolutely want to work in a workspace with a specific name:
|
5. To administer workspaces
This page allows:
- connecting a workspace to Calenco Translator ;
- connecting workspaces in order to authorize the sharing of content between them (Sharing between workspaces);
- activating the Workflow option and configure workflow templates (To set up workflow);
- adding or removing language spaces ;
- connecting Calenco to external storage servers;
- customizing attributes (To customize attributes);
- saving or restoring a workspace (Save a workspace, Restore a workspace).
5.1. To connect storage servers
5.1.1. To manage servers for storage
This feature enables to connect external storage servers to Calenco: they are services provided by the company. They are used to deposit the publications generated by Calenco on an (S)FTP server or to send the publications by e-mail (SMTP).
5.1.2. To define an external storage server for publications
Click on → to display this window:

Click on to define connections to storage server in this window:

Fill in the necessary data.
Click on OK to validate.
5.2. To customize attributes
The attributes are used to specialize these elements for different uses: profiling, specific processing, link...
Calenco offers an interface that allows you to customize the attributes to be as close as possible to your business:
- To customize the name of this attribute to match your business vocabulary (facet).
- To define a list of values to select them rather than enter them (and avoid typos), when editing or publishing.
Procedure 25. To customize an attribute
In → to display the list of attributes:

Select the desired elements using the check marks. For example, the
remapattribute is a generic attribute that can be used to specify an element (a list of components is a “classification”).Interpreting these attributes depends on the style sheet used. Consult Calenco Support for more information.
Enter the desired label in the selected specific attribute. The use of this custom attribute is then done in the editor To profile .
5.3. Save a workspace
In the menu of the space to save, click on to display this window:

Read the instructions carefully and select the items to back up.
![[Warning]](cco-warning.svg) | |
|
5.4. Restore a workspace
In the menu of the newly created Space, click to display this window:

Select the backed up workspace zip to restore it to this new space.
5.5. Clean up version history
The customer account manager can clean up the workspace at the level of the number of existing versions for each content.
In the menu, click to display this window:

Select and/or specify the desired parameters for the number, type of versions and their creation date.
| |
All content in the workspace is affected by this action. This operation is irreversible. |
6. View the available fonts
From the menu, the customer account manager can consult the list of all the fonts available for the style sheets that can be configured via the layout studio or managed directly by the customer.

If a desired font is not part of this list, please contact your usual NeoDoc contact for its installation.
| |
It is the customer's responsibility to verify that the font to be installed is free of rights or the customer has the right to use this font. Also make sure that the typeface is compatible with the alphabets of your published documents. |